Assembled espresso controller
This has kept me busy all morning and was either a lot of fun, or the funes from the rosin-core solder have been getting to me…
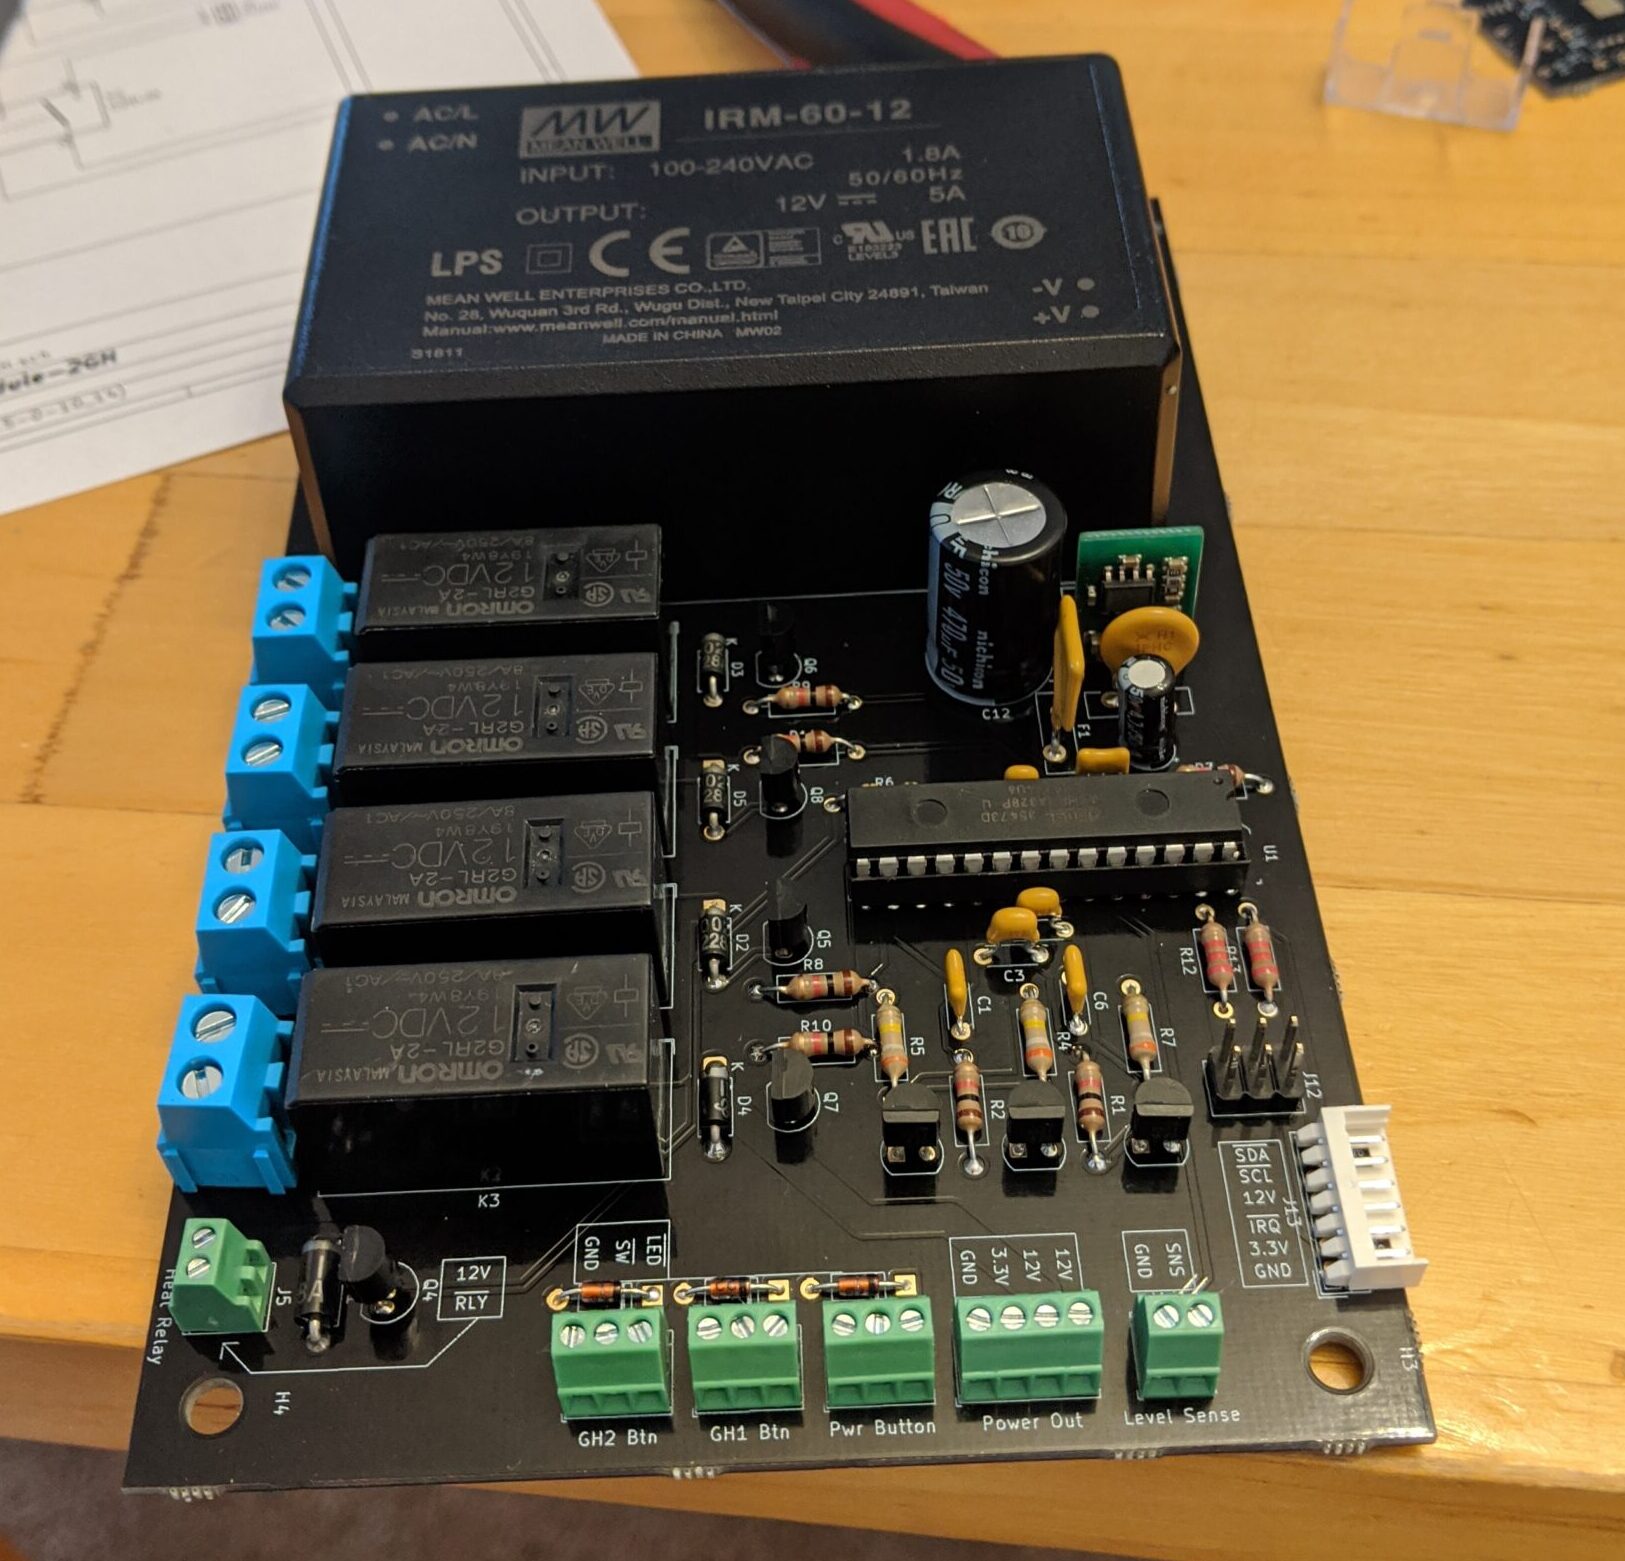
I assembled my espresso controller and gave it the first power on and it seems to work marvelously!
While testing it, I’ve made a few notes and discovered a few things that I may have overlooked:
- I miscalculated the transistor for the large heating element relay. It doesn’t quite have enough gain to drive it, so I’ve replaced it with one I found in the parts bin that does. In the future, I’d probably just use a driver chip or digital MOSFETs, but hey, it works and is now very overpowered.
- I had forgotten that diodes rarely perform like an ideal diode (duh!). The zeners I used to clamp any ESD or induced noise on the buttons and LEDs actually pulled too much current from the microcontroller inputs on the buttons, thus making it look like the button was always pressed. For now, I’ve removed them while I have higher voltage ones on order.
- My RC debounce filters are backwards and don’t really do much. I’ll do debouncing in software for now and fix it in the next revision.
Those issues aside, it seems to be working well. I’m not going to install it without the protection diodes because I’ve observed on my oscilloscope that when the pressurestat in the machine switches (especially when it switches off) as much as 100V transient can be induced into nearby lines. I’ll obviously try to route wires so this doesn’t happen, but I don’t need to blow up my new board on my first shot.